How to use CKEditor and its plugins with Nuxt.js
CKEditor is one of the best WYSWYG Rich Text Editors. Here I would show you how to use it in your Nuxt.js project.
CKEditor is a Javascript-based, rich text editor. It has a clean UX loaded with features that make it a no-brainer choice for your next custom Javascript CMS. It can be tedious to figure out its integration with Vue.js Framework like Nuxt.js Let's jump straight to steps. Let's jump straight to steps.
Create Nuxt App
If you already have an ongoing project, then you can skip this step.
Use create-nuxt-app package using npx.
npx create-nuxt-app ckeditor-nuxt-sample
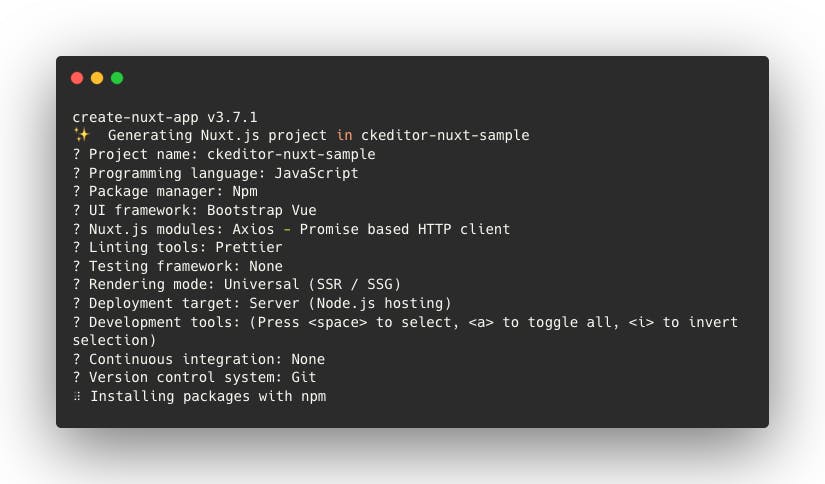
Choose options suitable to you, here are my selection for this article.
Create Page where you want to use CKEditor
Create file named sample-editor.vue in pages directory in your Nuxt project. You can name it the way you want.
Here is initial code in the file.
<template>
 <h1>Sample Editor will go on this page.</h1>
</template>
<script>
export default {}
</script>
You can now see this page at localhost:3000/sample-editor
Install Packages
Install these packages for CKEditor and full build.
npm i @ckeditor/ckeditor5-vue@23.0.0 --save
npm i @blowstack/ckeditor5-full-free-build@1.0.2 --save
Initiate CKEditor and its config
The second package mentioned above has CKEditor build contains all the free plugins for CKEditor. Thanks to BlowStack. Initialize CKEditor and Build in script section of your vue component.
let FullFreeBuildEditor;
let CKEditor;
if (process.client) {
  FullFreeBuildEditor = require('@blowstack/ckeditor5-full-free-build');
  CKEditor = require('@ckeditor/ckeditor5-vue')
}else {
  CKEditor = { component : {template:'<div></div>'}}
}
Note- CKEditor can be used only on the client render and not server render hence process.client check.
Now you can register the component provided by this package in components section on your page.
components: {
    ckeditor: CKEditor.component
},
Next, you need to pass FullFreeBuildEditor to the editor prop of CKEditor component, so that it knows about which features to render.
We first initialize editor property in data section like below.
data() {
  return {
      editor: FullFreeBuildEditor,
  }
},
Now we pass it to ckeditor as a prop. See snippet below.
<ckeditor :editor="editor" />
After this you can see CKEditor like this
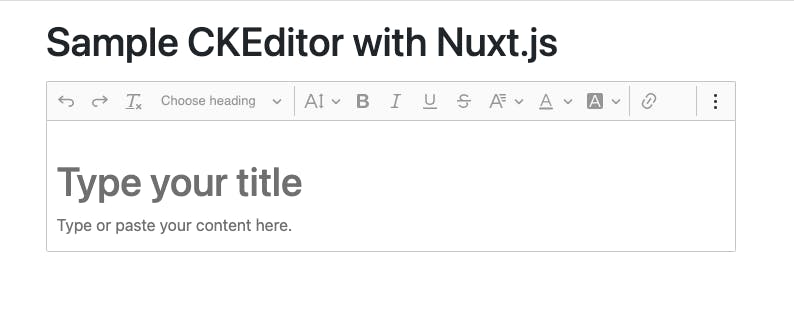
Still, this is not complete.
How will you bind it to the data property of your component? Use v-model. Here's how.
<ckeditor :editor="editor" v-model="editorInput" />
Let's try to display the output just below the editor using the following snippet.
<div class="container mt-3">
  <div class="row">
    <h2 class="col-md-12">Output</h2>
      <div>{{editorInput}}</div>
  </div>
</div>
You'll see something like this.
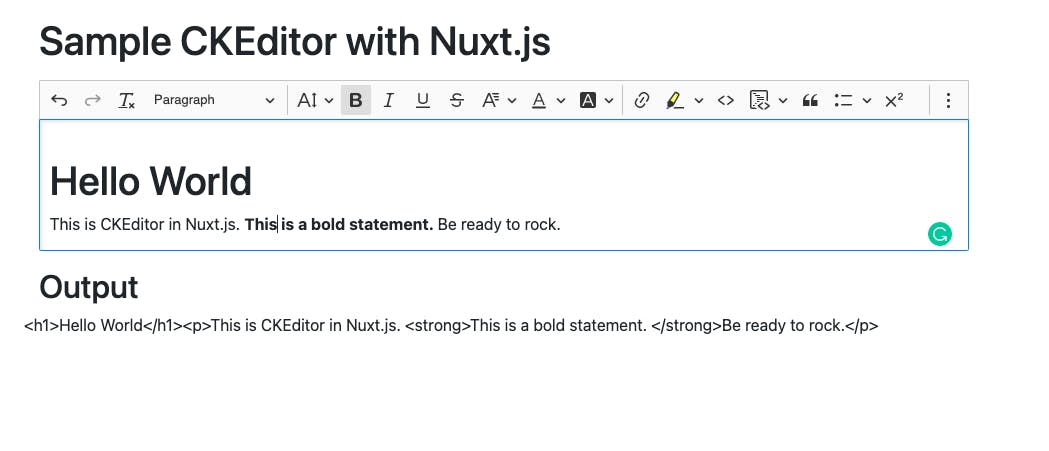
If you want to see a preview of this output then you can use the v-html directive. Something like this.
<div class="container mt-3">
  <div class="row">
    <h2 class="col-md-12">Preview</h2>
      <div v-html="editorInput"></div>
  </div>
</div>
Edit Configuration
The number of features that CKEditor supports can be overwhelming for your users. You can modify the look and limit the features if you want. For that config prop of CKEditor comes into the picture.
Add new data property called editorConfig to your component and add it as a prop to ckeditor component. See the snippet.
data(){
  // Other properties
  editorConfig: {
    width: 'auto',
    plugins: [
      'Bold',
      'Link',
      'List',
      'FontSize',
    ],
  }
}
CKEditor Line changes as follows
<ckeditor :editor="editor" :config="editorConfig" v-model="editorInput" />
Above 2 changes tells ckeditor to only include bold,link,list,fontSize plugins and hence only these options. Here is the output.

You can view a full list of plugins here.
Now you have integrated CKEditor totally within your Nuxt.js project. You'd now see that your code for the page component is a little unclean. Let's see how to tackle this.
Refactor to separate component
Now, we'll clean up some code. Suppose in a real-world project, you'll need to use this rich editor on multiple pages. Then you should refactor the code into a separate component. Let's call it rich-editor.
For that create rich-editor.vue inside components directory. We will encapsulate the CKEditor code inside this.
Pro Tip: If you do this refactor step. You can easily replace CKEditor with some other editor if needed.
We will move the editor config to prop of this rich-editor component. This will allow us to have rich editor with different configurations and different features on every page where we need it.
We will also move value to prop, so that we can pass v-model on the component and that variable will bind to the input of the rich-editor.
Here is the code for rich-editor.vue
<template>
  <ckeditor
    :editor="editor"
    :value="value"
    :config="config"
    @input="event => $emit('input', event)"
  />
</template>
<script>
  let FullFreeBuildEditor;
  let CKEditor;
  if (process.client) {
    FullFreeBuildEditor = require('@blowstack/ckeditor5-full-free-build');
    CKEditor = require('@ckeditor/ckeditor5-vue')
  }else {
    CKEditor = { component : {template:'<div></div>'}}
  }

  export default {
    name: 'ck-editor',
    components: {
      ckeditor: CKEditor.component
    },
    props: {
      value: {
        type: String,
        required: false
      },
      config: {
       type: Object,
       required: false,
       default: function () {}
     }
    },
    data() {
      return {
        editor: FullFreeBuildEditor,
      }
    },
  };
</script>
MathType Plugins
If you want to type Mathematics Equations or Chemistry Equations, then you need this plugin.
You just need to add MathType to the array of plugins in the editor config prop.
editorConfig: {
  width: 'auto',
  plugins: [
    'Bold',
    'Link',
    'List',
    'FontSize',
    `MathType`
  ],
}
That's all. Allow any complicated maths equations or chemical reactions into your Nuxt app. See Figure below.
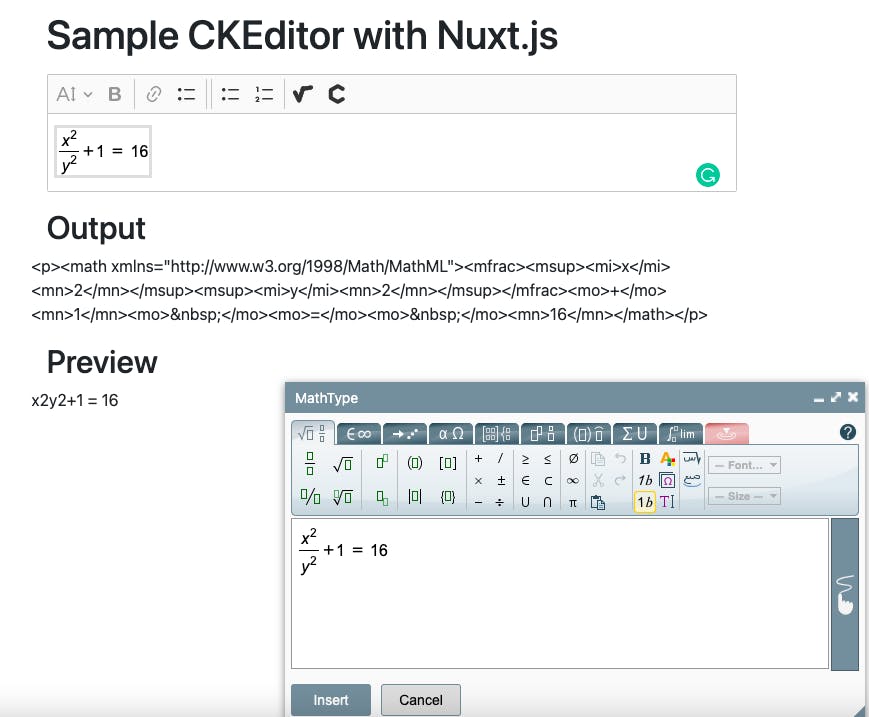
Image Plugins
Image plugin allows you to upload images into your editor but you need to give a REST Endpoint where images will be posted. This endpoint should return the URL to the uploaded image. That URL can be used to store and display the image along with other content. Here's what you change in config.
//CKEditor Config for Image Upload
editorConfig: {
  width: 'auto',
  plugins: ['Bold','Link','List','FontSize', `MathType`,`Image`,`ImageUpload`,'SimpleUploadAdapter'],
    simpleUpload: {
       // The URL that the images are uploaded to.
       uploadUrl: 'https://yourwebsite.com/api/upload-image',
    },
}
Keep in mind simpleUpload and uploadUrl should be spelled correctly in order for this to work. If you are facing any issues with this. Hit me up on DM.
Embed Plugin
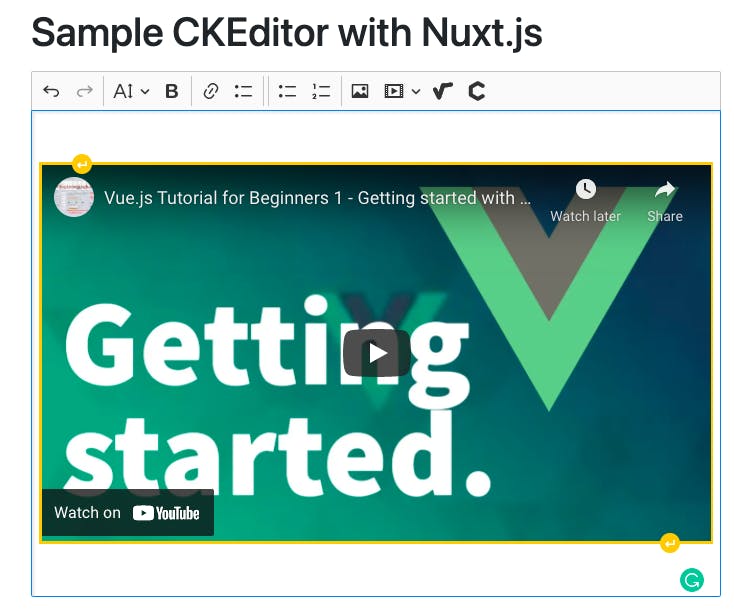
You can embed in video or social media links using MediaEmbed plugin. Simply push this to plugins array and you have done it. Here is the sample screenshot.
Conclusion
We integrated CKEditor with our fresh Nuxt.js project. After that, we refactored code and played around with some different useful plugins. This can be difficult to figure out but it's a very powerful tool to have. Let me know if you face any difficulties in any of the above.
You can also check the whole code on this Github repo.
Happy Coding. Currently, this article works for Vue 2 only. Originally posted on https://appsyoda.com/blog/ckeditor-with-nuxtjs
